
Mindray Datascope Passport 2 Monitor Power Module Back Cover 019800005OB Equipment Protective Casing
Mindray Datascope Passport 2 Monitor Power Module Back Cover 019800005OB Equipment Protective Casing
| Product Type | Power Module Back Cover |
| Part No | 019800005OB |
| Fixing Method | 4 pre-drilled screw holes |
| Function | Protects power components |
| Condition | used with good working |
| Material | Medical-grade ABS plastic |
| Applicable Type | Passport 2 |
| Color | white shell |
| MOQ | 1pcs |
| Advantages | Precise fit with power module, medical-grade insulation |
| Warranty | 90 days |
Product Overview
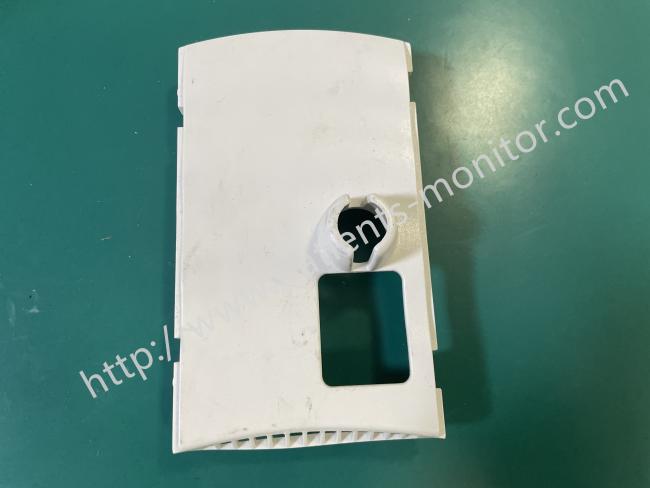
When you need to maintain or servicing your Mindray Datascope Passport 2 monitor, the power module back cover (part number: 019800005OB) is a critical housing component. As the monitor's main unit's safety backplate, it is specifically designed to encapsulate and protect the delicate internal power conversion module and core circuitry.
It is a white plastic housing with a copper-colored heat sink embedded inside. It also features pre-drilled holes for the power module interface and a snap-fit mechanism for engaging the module. Protecting the internal high voltage and sensitive components from the external environment is fundamental to ensuring stable power supply and safe operation of the Passport 2.
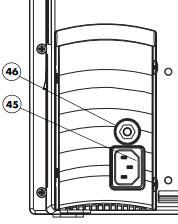
No 45. AC Receptacle
Insert an AC power cord into this connector.
CAUTION: Use only Mindray DS supplied power cords, or if a substitute is necessary, use only hospital grade power cords.
No 46. Equipotential lug
Provides Equipotential grounding of hospital equipment
Advantages:
Its primary function is to protect the stable operation of the power module.
1. External Protection: The outer shell is made of anti-aging medical-grade plastic.It shields the power module from dust and minor impacts in the clinical environment, preventing direct exposure and damage to the internal components.
2. Auxiliary Heat Dissipation: The copper-colored heat sink on the inner side helps dissipate heat generated during operation, maintaining a stable operating temperature.
3. Precise Fit: It aligns the power module's interface with pre-drilled holes and secures the module components with clips to prevent loosening or misalignment during use.
Disassembly Steps:
1. Preparation: Ensure the device is powered off. Prepare appropriate tools, typically including a set of matching Phillips screwdrivers.
2. Remove External Screws: Locate all screws securing the back cover. When using a screwdriver, ensure the tip is fully engaged in the screw slot before applying even pressure to prevent slippage and damage.
3. Loosen the Back Cover: It is recommended to loosen multiple screws diagonally, alternating turns, one turn at a time to evenly release stress and prevent deformation of the back cover.
4. Remove the Back Cover: After removing all securing screws, hold the device and back cover firmly with your hands and carefully separate them. Check for any connecting cables; if present, disconnect them first.
Notice:
1. Always disconnect the monitor's power supply before disassembly or assembly to avoid touching internal components while the power is on;
2. Do not use metal tools to pry open the clips, and do not forcefully pry open the back cover to prevent the plastic clips from breaking or the casing from deforming;
3. Clean only with a dry, soft cloth. Do not use liquid cleaners, especially avoid letting liquid seep into the inner heat sink area;
4. After installation, always check that the back cover is securely fastened. A loose cover will not only compromise protection but may also affect the heat dissipation of the power module.
Get in Touch
Have questions about our products or want to discuss a custom order? Our team is ready to help you.